ParPay Setup
The following steps are used to set up and configure ParPay.
Environmental requirements
As opposed to Heartland/Pax devices, where the payment device needs static LAN information for the register to look for and reach out to on the LAN, Ingenico/ParPay devices are configured to look for the IP of its respective register. Thus, each register configured for ParPay MUST have a static IP address to assure continued functionality without disruption.
Device Setup/Phyisical Connections
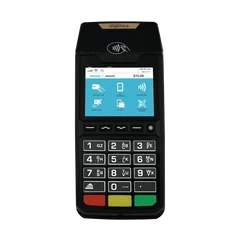
ParPay uses an Ingenico Lane 3600 EMV payment device for primary POS terminals. This device uses ethernet/TCP interface to communicate with the POS. When installing this device, it is likely that a site has a pre-existing Heartland payment device that will need to be removed prior to installing ParPay.
1. Plug in the device power supply into the attachment point on the Lane 3600 data cable, pictured below.
2. Plug in the attached ethernet connection to the available network drop/ethernet switch under the counter.
The device should now be powered on and connected to the network.
Brink Configuration
As with any other integrated payment system, you will need to create an instance for PARPay in Brink Integrations Portal and then assign that listing to the register. If a site is using more than one Lane 3600, you still only need to create one Integrations Portal Instance.
(NOTE: You are only required to create one instance of PARPay in the integrations portal, regardless of how many PARPay devices a site will be using. You will need to assign the PARPay instance to every register that will be using PARPay.)
1. Open Integrations Portal in Brink and hit the small plus-sign symbol next to "Payment Devices" to add a new payment device
2. Name the payment device "ParPay" and select "PAR Pay" from the dropdown list under "Model". Leave the subsequent settings as they are. Select "Done".
3. Select "Peripherals" under "Registers at the bottom of the Integrations Portal screen.
4. Select "ParPay" from the dropdown list to assign it to the register you wish to assign it and press "Save"
After this, you will need to sign back into Brink and test a transaction.
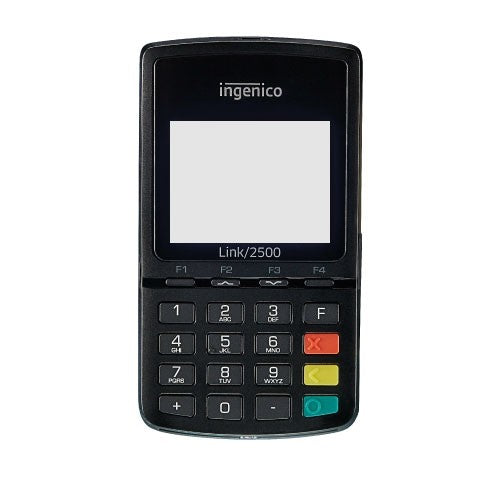
Link 2500 Setup
Sites with linebuster tablets will also be furnished with a wireless payment terminal, the Ingenico Link 2500. Supplied with this device is a USB A to USB C cable for charging. The device will connect to the internet via WIFI.
The steps below will outline how to connect the Link 2500 to WIFI:
1. To power on the device, press and hold the green button.
2. Once you are at the main "PAR Payments" screen, press the numbers "3826" on the keypad. The device will display "REBOOT IN PROGRESS" and then will reboot.
3. The device will then boot up into a screen that says "Payment: AMOUNT 0.00eur". Press the "F" button on the keypad to continue.
4. In the menu, use the "F3" button (arrow down) to navigate to the "Control panel" option.
5. Select the "Terminal Settings" option
6. Select the "Comm means" option
7. Select "Wi-Fi"
8. Select "Scan networks". This will populate a list of available Wifi connections. Please use the "F3" key to navigate to your desired wifi.
9. Enter the password of this network. This part can be particularly tricky if the password is complex. You must use the "F1" and "F4" keys to move the cursor left and right, respectively, and the "F2" and "F3" keys to move up and down, respectively. You also must use the selections at the bottom left hand corner of the screen to change between alphabetical, numerical and symbols. Navigate down to the green field in the bottom right to confirm. The, if the password is correct, the device is now connected to wifi.
10. Reboot the device by pressing and holding the yellow key and the "#" key.
Troubleshooting the Lane3600
Payment device configured to wrong register IP address:
Symptom: Getting "CCT NOT READY" on POS when attempting to process a card
Solution: The payment device is likely configured to look for the wrong IP address for its respective register. To remedy this you must:
-Press "1957" on the keypad to open the settings menu. You will be prompted to enter a password, which is "911985". Then press the green button.
-Select "edit config" from the menu options
-Select "ECR URL" from the menu options
-Input the POS's correct IP address into the field and then press the green button to save
-Select "ECR IP" from the menu option and input the register IP into this field as well. Then press the green button to save.
-Back out of the menu by pressing the red key several times. The device should then reboot. If it does not reboot on it's own, press and hold the green button until
the device powers off. Then press the green button again to power back on.
Related Articles
Pax A35 Wifi Setup Instructions
Pax A35 WiFi Setup Instructions Connect Power This device is powered using a USB C connection and outlet. Home Screen Navigate to the Home Screen. The quickest way if it is currently running the Portico app is to hold the red and green button till a ...